IDA使用技巧
快捷键
可以使用 IDA 菜单栏 Options > Shortcuts 来查看、修改、添加快捷键。
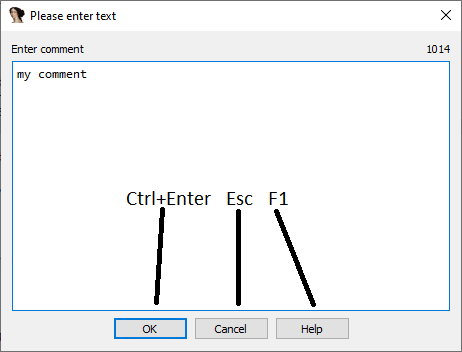
文本输入框
使用 Ctrl+Enter 进行确认,使用 ESC 取消,使用 F1 查看帮助。使用所有的文本输入框,如注释、编辑本地类型等。
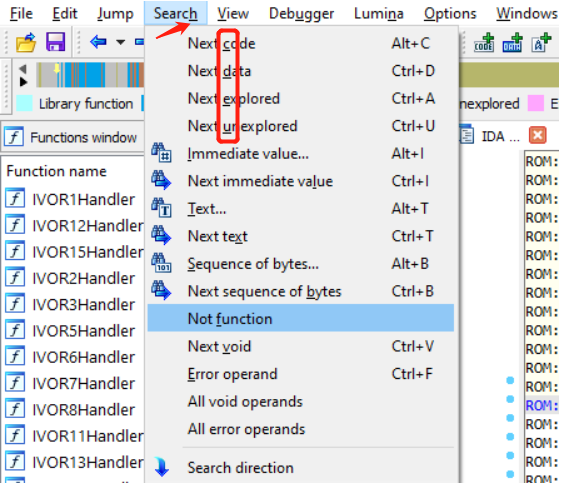
快速菜单导航
使用 Alt 键,可以在菜单项下看到下划线,同时按住带下划线的字母可以打开该菜单。可以通过 cfg/idagui.cfg 文件修改相应的加速键。
对话框
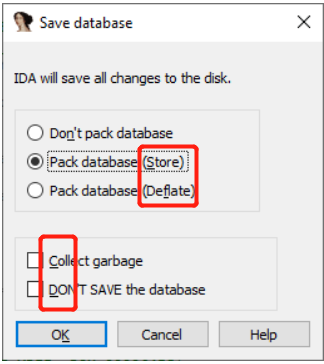
Tab 键切换对话框上多个控件的焦点,使用 Space 键选中焦点对应的控件,也可以使用 Alt 键显示相关的加速键。
例如:快速退出 IDA 并丢弃自打开的数据库以来的所有修改,可以使用下列快捷键。
Alt + F4退出IDA,将会显示保存数据库的对话框。D选择DON’T SAVE the database复选框。Enter或者Alt + K确认。
命令面板
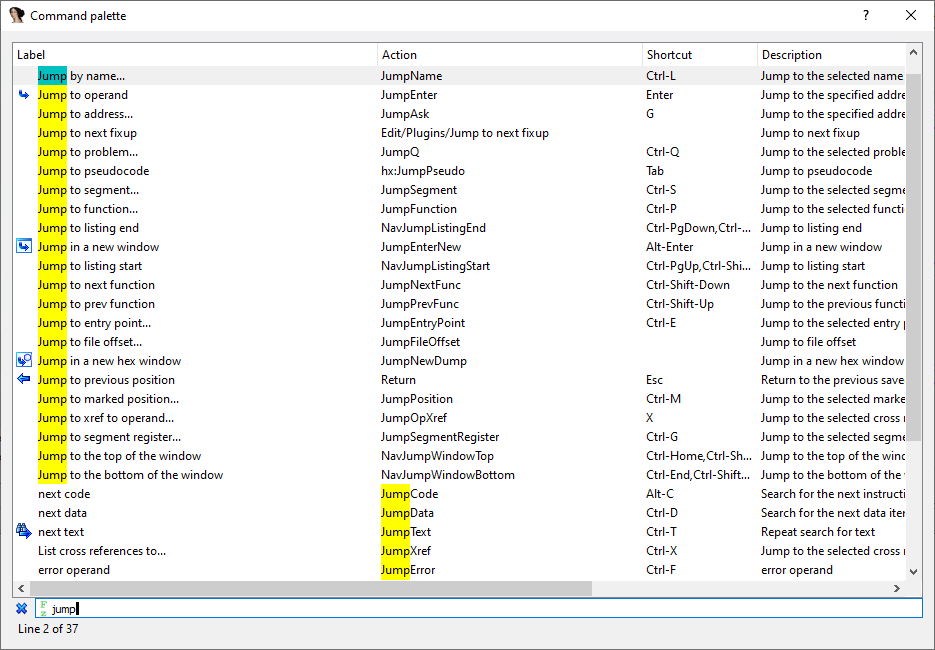
使用 Ctrl + Shift + P 可以打开命令面板,可以在底部输入文本过滤相关操作。
选择
按住 Shift 使用 光标导航键 ← ↑ → ↓ 。
Alt + L 选择开始,然后导航到需要选择的末尾,执行相应的操作,最后 Alt + L 结束选择。
代码分析
Ctrl + PgUp 转到数据库开头。
Ctrl + PgDn 转到数据库开头。
选中按 C 将选中的数据转为代码。
选中按 T 转换为结构体偏移。
选中按 A 将选中的数据转为代码。
高亮导航
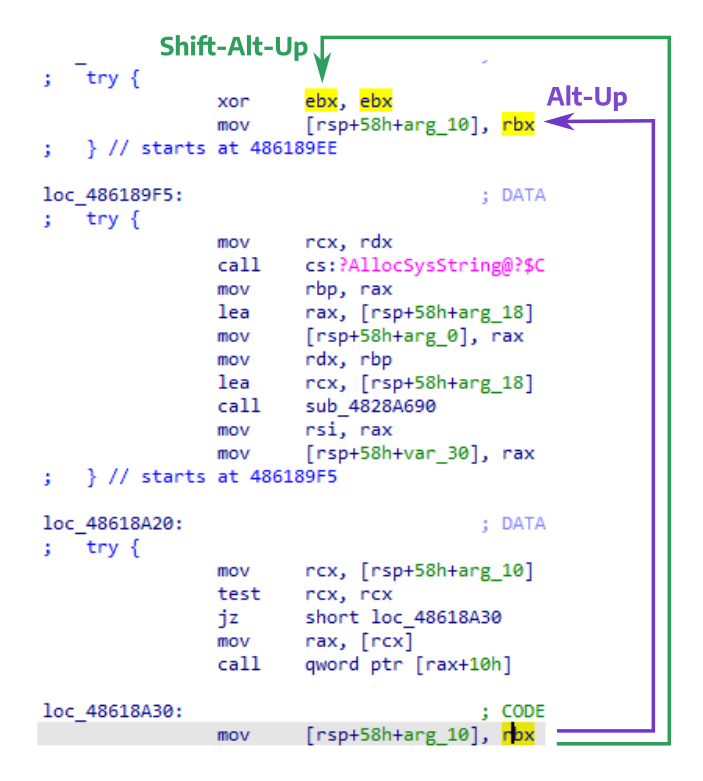
Alt + Up 或 Alt + Down 实现选中的高亮字符串之间前后跳转。
IDA 7.5 新增功能
Shift + Alt + Up 查找定义(写入)所选寄存器的先前位置。Shift + Alt + Down 查找使用所选寄存器的下一个位置。
IDA 7.2 新增功能
Ctrl + Shift + Up / Ctrl + Shift + Down 跳至上一个/下一个函数的开头。
IDA 命令行
打开文件
1 | ida <filename> |
<filename> 可以是您要反汇编的新文件或现有数据库。这种用法基本上与使用“文件”->“打开”或将文件拖放到IDA的图标上相同。您仍然需要手动确认“加载文件”对话框中的选项或IDA显示的任何其他提示,但是会跳过初始启动屏幕。
自动选择Loader
1 | ida -T<prefix> <filename> |
其中 <prefix> 是“加载文件”对话框中显示的加载器描述的唯一前缀。相关选项如下:
1 | -TMicrosoft Microsoft.Net程序集 |
当 <prefix> 包含空格时,使用引号将 <prefix> 包起来。For example, to load the first slice from a fat Mach-O file:
1 | ida "-TFat Mach-O File, 1" file.macho |
如果是 ZIP 格式的归档文件,则可以指定要在冒号后装入的归档成员。要从 apk 中加载主dex文件:
1 | ida -TZIP:classes.dex:Android file.apk |
但是,通常最好在顶层选择APK加载程序
1 | ida -TAPK file.apk |
当-T指定时,将跳过初始加载对话框,并且IDA会直接使用指定的加载器直接加载文件。
使用默认模式打开文件
1 | ida -A <filename> |
这将使用自主模式或批处理模式加载文件,其中IDA将不显示任何对话框,但在所有情况下均接受默认答案。
在此模式下,加载完成后将不会显示任何交互式对话框。要恢复交互性,请
batch(0)在 IDA 窗口底部的 IDC 或 Python 控制台中执行语句。
批量反汇编
1 | ida -B <filename> |
IDA 将使用所有默认选项加载文件,等待自动分析结束,将反汇编输出到 <filename>.asm 并在保存数据库后退出。
二进制文件选项
1 | ida -p<processor> -B<base> <filename> |
<processor>是IDA支持的处理器类型之一。<base>是加载基址(16进制)。
例如,要在线性地址 0xBFC00000 上加载大端 MIPS 固件:
1 | ida -pmipsb -bBFC0000 firmware.bin |
映射到 0x4000 的 Cortex-M3 固件:
1 | ida -parm:ARMv7-M -b400 firmware.bin |
打印log
1 | ida -B -Lida_batch.log <filename> |
打开 log 输出信息。
批量反编译
反编译整个文件:
1 | ida -Ohexrays:outfile.c:ALL -A <filename> |
反编译 main 函数
1 | ida -Ohexrays:outfile.c:main -A <filename> |
定制批量反编译
Python脚本可与该 -S 开关一起使用,以在文件加载后自动运行
1 | ida -A -Sdecompile_entry_points.py -Llogfile.txt <filename> |
1 | from __future__ import print_function |
加快批处理速度
1 | TVHEADLESS=1 idat -A -Smyscript.idc file.bin >/dev/null & |
idat使用轻量级文本模式UI的文本模式可执行文件,不需要初始化初始化所有依赖的UI库,可以使用命令行参数在后台运行。
重新分析
重新分析指令
将鼠标放在需要重新分析的指令上,然后按 C 键转换为代码。
重新分析函数
使用 Alt + P 键编辑函数。
选中范围分析
按 Alt + L 选中开始,转到选择的结尾,按 C 键转换为代码。
重新分析整个数据库
- Menu Options > General…, Analysis Tab, Reanalyze program button;
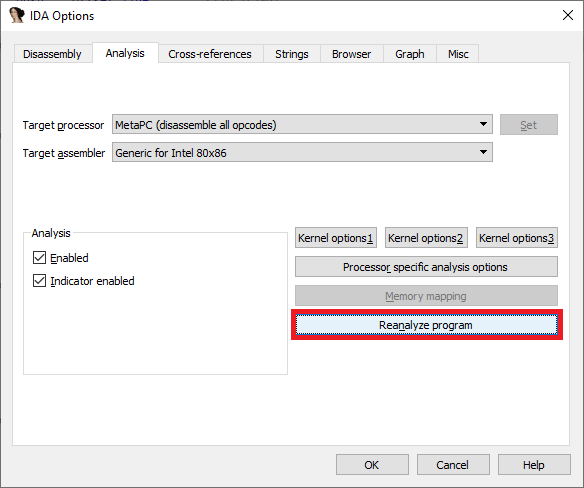
- 右键单击IDA窗口底部的状态栏,Reanalyze program .

数组
创建数组
使用 右键菜单-> Array… 创建一个数据,或者按 * 键创建数组。
创建字符串数组
- 首先创建第一个字符串。
- 选择所有需要创建的字符串,创建数组。
- 不选中
Create as array,点击OK即可。
结构体
使用已经格式化的数据
在反汇编中选中已经格式化数据,右键 -> Create struct from selection 并将其创建为一个结构。

使用本地类型
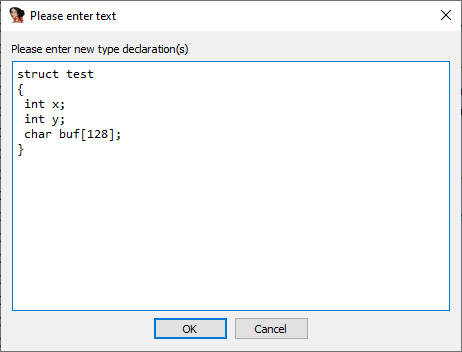
使用 Shift+ F1 或菜单 View > Open subviews > Local Types 打开本地类型。按 Ins 键创建一个结构体。
通过代码自动创建字段
选中结构体首地址的寄存器,按 T 键或者右键菜单 -> Structure offset 添加缺少的字段。
字符串
Unicode字符串
如果程序使用宽字符串,则在创建字符串文字时通常使用相应的 Unicode C-style 选项就足够了:
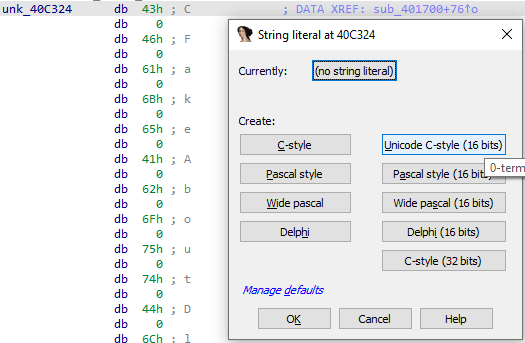
可以使用 Alt + A + U 快速创建 Unicode 16-bits 字符串。
添加新的编码
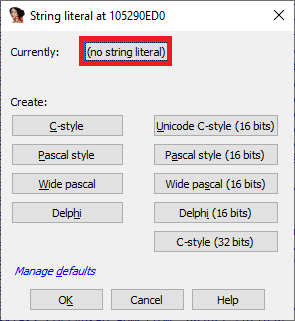
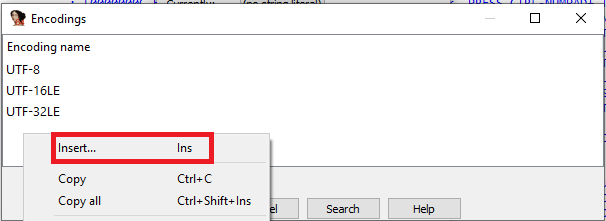
要将自定义编码添加到默认列表(通常为UTF-8,UTF-16LE和UTF-32LE):
- Options > String literals… (
Alt + A); - 点击
Currently:按钮。 - 右键菜单 ->
Insert…(Ins); - 指定编码名称。
对特定的字符串文字使用编码
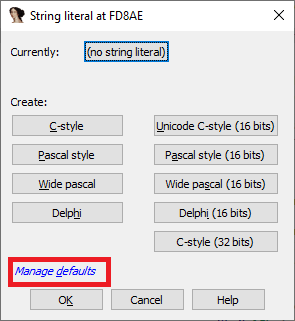
- Options > String literals… (
Alt + A); - 点击
Manage defaults。 - 单击
Default 8-bit旁边的按钮,然后选择要使用的编码。
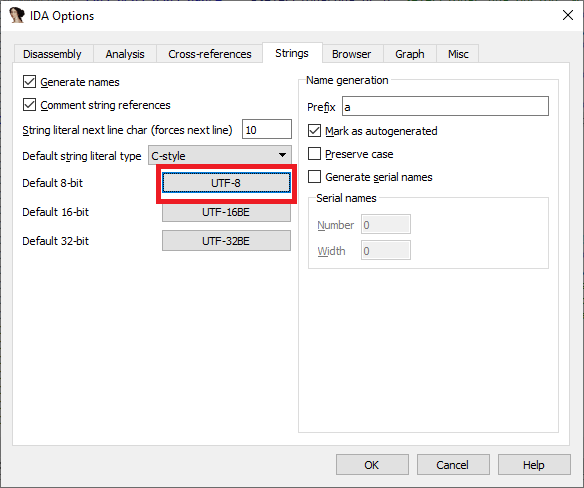
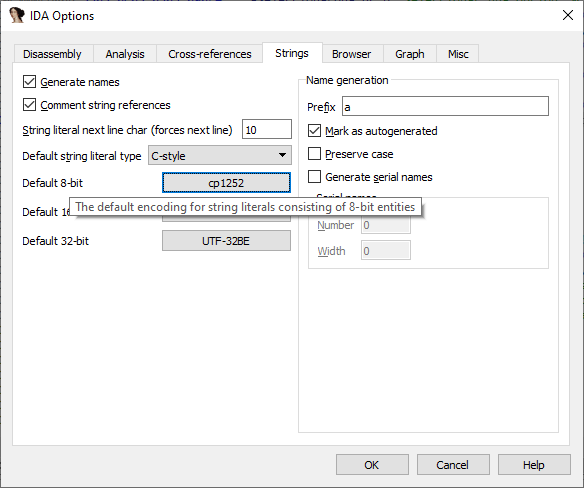
后续使用 A 键创建字符串将使用现在设置的默认编码。
其他
参考
IDA 博客 Igor’s tip of the week 系列文章