IDA 插件环境配置
环境:vs2019,ida7.3
使用 VS 配置 IDA C++ 插件环境
- 使用 VS2019 新建一个 C++ 空工程,添加 C++ 文件
myplugin.cpp, 添加如下代码:1
2
3
4
5
6
7
8
9
10
11
12
13
14
15
16
17
18
19
20
21
22
23
24
25
26
27
28
29
30
31
32
33
34
35
36
37
38
39
40
41
42
43
44
//以上是导入的SDK头文件
int idaapi init(void)
{
//IDA在启动的时候会调用每个插件的init函数。
//返回值有三种选项:
//PLUGIN_SKIP适合那些不支持的插件,IDA将不会加载该插件
//PLUGIN_OK适合那些执行一次性功能的插件
//PLUGIN_KEEP适合那些需要一直保持功能的插件
return PLUGIN_OK;
}
void idaapi term(void)
{
//当结束插件时,一般您可以在此添加一点任务清理的代码。
return;
}
bool idaapi run(size_t)
{
//当按下热键时候,执行功能的入口函数
warning("Hello, world!");
return true;
}
static char comment[] = "It's a plugin to show Hello world!";
plugin_t PLUGIN =
{
IDP_INTERFACE_VERSION,
0, // 插件的一些属性,一般为0即可
init, // initialize
term, // terminate. this pointer may be NULL.
run, // invoke plugin
comment, // 插件的说明,会显示在IDA下方的状态栏中
"", // multiline help about the plugin
"Hello, world", // 插件在列表中显示的名称
"Alt-F1" // 插件想要注册的功能快捷键
}; - 进入项目属性选项,进行如下配置
配置属性 -> 常规 -> 配置类型: 选中 动态库(.dll)。

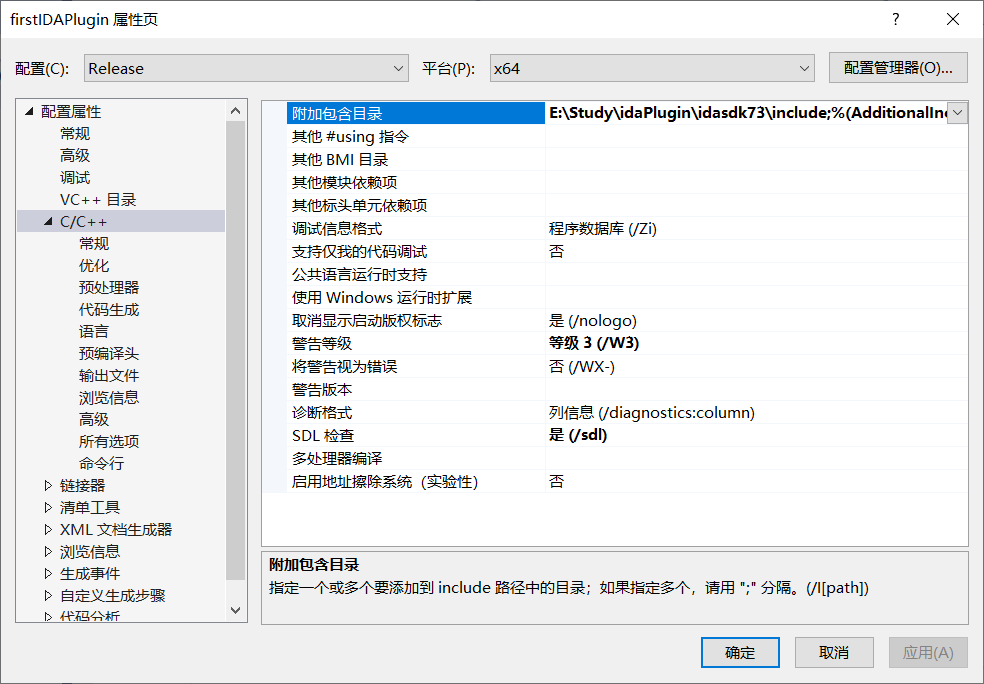
C/C++ -> 常规 -> 附加包含目录:添加 IDASDK include 目录。
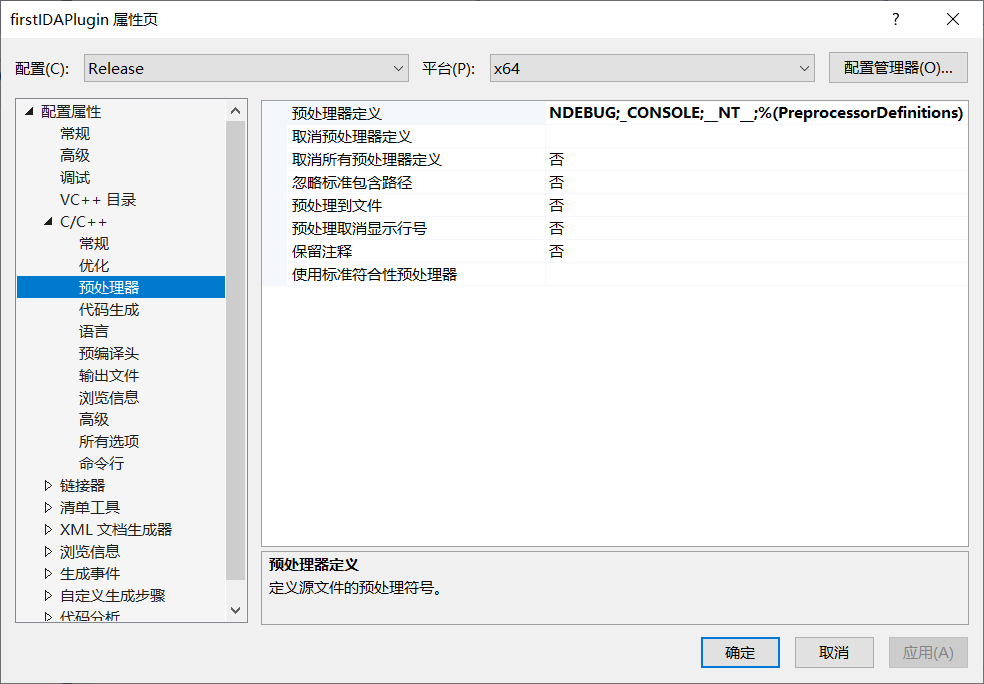
C/C++ -> 常规 -> 预处理器:添加 __NT__
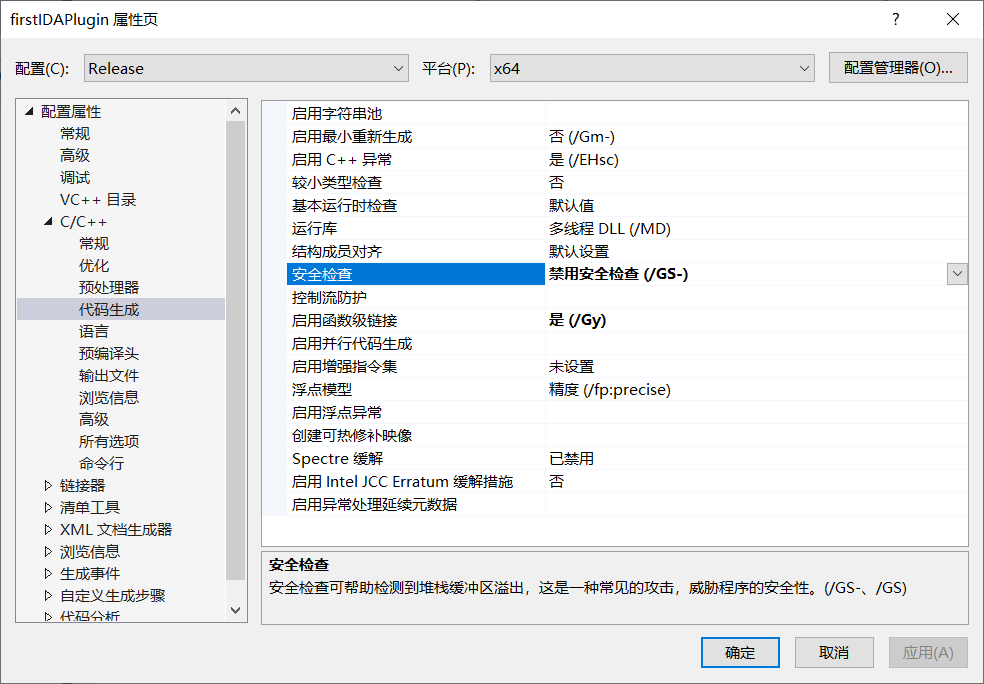
C/C++ -> 代码生成 -> 安全检查:修改为 禁用安全检查(/GS-)
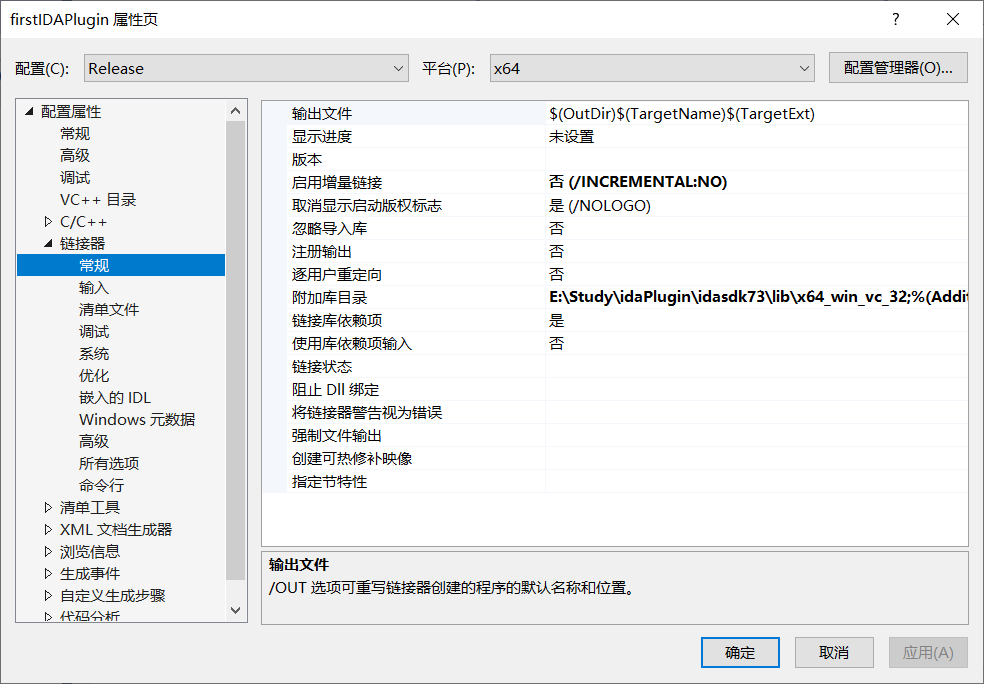
链接器 -> 常规 -> 附加包含目录:
- 针对
ida.exe,则添加idasdk\lib\x64_win_vc_32。 - 针对
ida64.exe,则添加idasdk\lib\x64_win_vc_64。
链接器 -> 输入 -> 附加依赖项:添加 ida.lib 。

通过以上配置就完成了 IDA 插件环境配置。
使用 CMAKE 配置 IDA C++ 插件环境
直接使用 ida-cmake 项目, 不过不同的编译环境需要修改相应的 gen 代码。下面为我修改适配 vs2109 的代码:
1 | def get_cmake_gen(target_version, custom_gen): |
使用 python 编写 IDA 插件
vscode 使用相应的插件 idacode
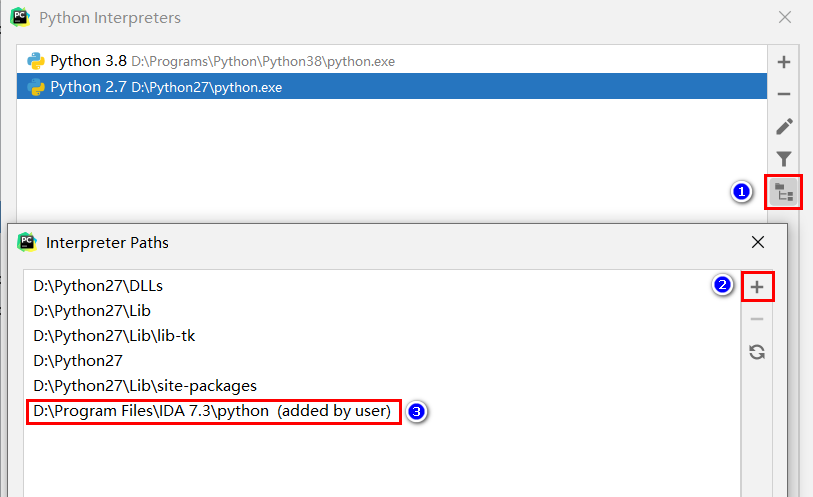
pycharm 导入对应的文件夹既可高亮提示,如下图所示如何导入:
1 | class UnknowClass(idaapi.plugin_t): |